数据库sharding实战入门
数据库表sharding概念很简单,如何实操,完整的文档很少。经过摸索,成功实现了插入数据的sharding整个过程.
pom.xml依赖:
<dependency>
	<groupId>org.apache.shardingsphere</groupId>
	<artifactId>sharding-jdbc-spring-boot-starter</artifactId>
	<version>4.0.1</version>
</dependency>
<dependency>
	<groupId>com.alibaba</groupId>
	<artifactId>druid</artifactId>
	<version>1.1.22</version>
</dependency>
spring配置文件
application.yml
server:
  port: 9081

spring:
  application:
    name: sharding
  profiles:
active: devapplication-dev.yml这里配置了sharding分为2个库,每个库有16个表(0-9 a-f),这是里面配算法类决定的。
分库分表的片键(数据表字段)都是seller_id
spring:
  shardingsphere:
    datasource:
      names: ds0,ds1
      ds0:
        type: com.alibaba.druid.pool.DruidDataSource
        driver-class-name: com.mysql.cj.jdbc.Driver
        url: jdbc:mysql://localhost:3306/demo_ds_0
        username: root
        password: xxx
        maximumPoolSize: 50
      ds1:
        type: com.alibaba.druid.pool.DruidDataSource
        driver-class-name: com.mysql.cj.jdbc.Driver
        url: jdbc:mysql://localhost:3306/demo_ds_1
        username: root
        password: xxx
        maximumPoolSize: 50
    sharding:
      tables:
        product: #======================商品表========================
          database-strategy: #分库策略
            standard: #分片键
              sharding-column: seller_id
              precise-algorithm-class-name: net.highersoft.config.ProductDBSharding
          ##分表策略
          #key-generator-column-name:
          actual-data-nodes: ds$->{0..1}.product_$->{(Integer.toHexString(0)..Integer.toHexString(255)).collect{t ->t.padLeft(1,'0')}}
          table-strategy:
            standard: #分片键
              sharding-column: seller_id
              precise-algorithm-class-name: net.highersoft.config.ProductTableSharding
先看分库的类ProductDBSharding:
package net.highersoft.config;

import lombok.extern.slf4j.Slf4j;
import org.apache.shardingsphere.api.sharding.standard.PreciseShardingAlgorithm;
import org.apache.shardingsphere.api.sharding.standard.PreciseShardingValue;

import java.math.BigInteger;
import java.util.Collection;


@Slf4j
public class ProductDBSharding implements PreciseShardingAlgorithm<String> {
    private static final Integer SHARDING_LEN = 1;

    @Override
    public String doSharding(Collection<String> databaseNames, PreciseShardingValue<String> preciseShardingValue) {
        if (preciseShardingValue != null) {
            String sellerId = preciseShardingValue.getValue();
            if (sellerId.length() > SHARDING_LEN) {
                //获取用户id的后位16进制
                String hexValue = sellerId.substring(sellerId.length() - SHARDING_LEN);
                BigInteger bigint = new BigInteger(hexValue, 16);
                //将16进制转化为10进制
                int num = bigint.intValue();
                if (num >= 0 && num <= 7) {
                    return "ds0";
                } else if (num > 7 && num <= 16) {
                    return "ds1";
                } else {
                    throw new UnsupportedOperationException("Supplier id is wrong.");
                }
            } else {
                throw new UnsupportedOperationException("Supplier id is null.");
            }
        } else {
            throw new UnsupportedOperationException("PreciseShardingValue is null.");
        }
    }
    public static void main(String args[]) {
    	String hexValue ="b";
        BigInteger bigint = new BigInteger(hexValue, 16);
        //将16进制转化为10进制
        int num = bigint.intValue();
        System.out.println(num);
    }
}
先看分表的类ProductTableSharding:
package net.highersoft.config;

import org.apache.shardingsphere.api.sharding.standard.PreciseShardingAlgorithm;
import org.apache.shardingsphere.api.sharding.standard.PreciseShardingValue;

import java.util.Collection;


public class ProductTableSharding implements PreciseShardingAlgorithm<String> {
    private static final Integer SHARDING_LEN = 1;

    @Override
    public String doSharding(Collection<String> availableTargetNames, PreciseShardingValue<String> shardingValue) {
        if (shardingValue != null) {
            String sellerId = shardingValue.getValue();
            String logicTableName = shardingValue.getLogicTableName();
            if (sellerId.length() > SHARDING_LEN) {
                String hexValue = sellerId.substring(sellerId.length() - SHARDING_LEN);
                return logicTableName + "_" + hexValue;
            } else {
                throw new UnsupportedOperationException("Supplier id is null.");
            }
        } else {
            throw new UnsupportedOperationException("PreciseShardingValue is null.");
        }
    }
}
建库建表,在写代码之前或之后建都行,这样手工建好,表里要有片键,如上面的seller_id: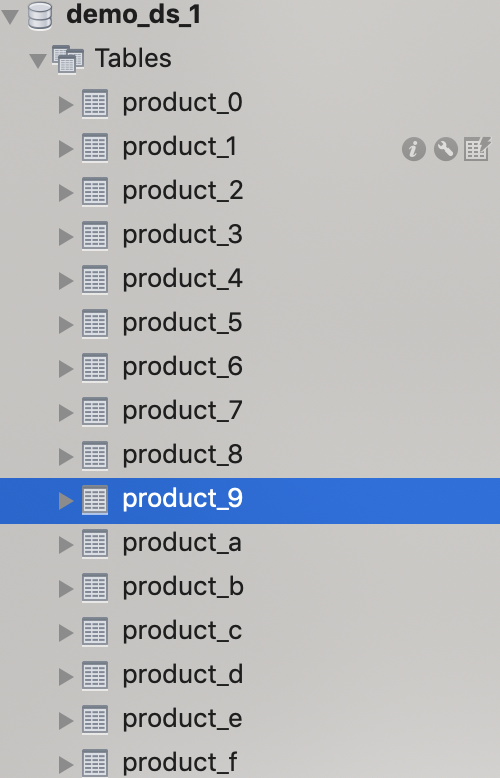
最后编写插入代码:
类名不是商品的,我就不改了,在springboot启动后,可运行这个Service
package net.highesoft.ssm.service;

import java.util.Map;

import org.apache.commons.logging.Log;
import org.apache.commons.logging.LogFactory;
import org.springframework.beans.factory.annotation.Autowired;
import org.springframework.stereotype.Service;

import net.highesoft.ssm.mapper.UserMapper;
@Service
public class UserService {
	private static Log log=LogFactory.getLog(UserService.class);
	@Autowired
	private UserMapper userMapper;


	public void addObj(){
		userMapper.addUser("11", "123");
		userMapper.addUser("11", "12b");
	}

}
Mapper类,注意表名,只有前缀product:
package net.highesoft.ssm.mapper;

import org.apache.ibatis.annotations.CacheNamespace;
import org.apache.ibatis.annotations.Insert;
import org.apache.ibatis.annotations.Mapper;
import org.apache.ibatis.annotations.Param;

@CacheNamespace(readWrite = false)
@Mapper
public interface UserMapper {
  @Insert({"insert into product(sku,seller_id) values(#{sku},#{sellerId})"})
  void addUser(@Param("sku")String sku,@Param("sellerId")String sellerId);
}
最后执行完,是不是两行记录到不同的库不同的表里去了?
最后把这个算法说明一下,这个取的是最后一位字符,这个字符是有范围要求的(0-9,a-f,A-F),否则转换成16进制会失败.转换方法:
String hexValue ="g";
BigInteger bigint = new BigInteger(hexValue, 16);
//将16进制转化为10进制
int num = bigint.intValue();
System.out.println(num);
16个数就可分成2等分,为两个库。每个数为一个表,就是每库16表。这是上面代码的算法。这个比较简单可自行修改。
相关阅读
评论:
↓ 广告开始-头部带绿为生活 ↓
↑ 广告结束-尾部支持多点击 ↑